I have been known to like organizing things. Shopping for office supplies is almost – almost – as fun as shoe shopping. I was beside myself when I finally got a label maker. You get the idea.
So since I have a business now I would need a place to keep all my stuff and actually do some work. When TB moved in last year the second bedroom became an office so he could work from home. We repainted and set up the shelving he brought with him. I rarely went in there. But since I now needed a desk of my very own I had to muscle my way in.
The main problem is the room is a small bedroom in an old house. How were we going to fit work areas for two? I thought putting up some shelves would give me somewhere to keep my files and records plus my paperclips and post-it collection. Under that I could set up this antique drafting table my mom let me steal which could be folded up and put away if we needed the space. Instead of taking up too much floor space I would go up.
First we start with some shelves. Shelving can get expensive but I used what I had and only had to pick up a few little things.
I bought inexpensive wood supports from Lowes for about $3 each and painted them black. If you screw little hooks into the side that faces the wall you can paint all the sides at once and hang them from a dowel or old curtain rod to dry. I figured this out after I painted all of them and they dried to the drop cloth. I wish I had a picture of this but you are out of luck.
For the shelves themselves there are a number of options available. Solid boards are expensive and some of the mdf/melamine boards can look cheap while costing a lot. Luckily for this project I measured wrong on another project and had a bunch of birch plywood left over so that’s what we went with.
When you are making your own shelves you now have to figure out how big they are going to be. First look and see if these shelves will be in the way of any door openings. You don’t want to get all done and realize you can only open the door enough for a small child to fit through. Next measure the depth of the stuff you want to put on it. I was looking to put notebooks and books up there so they would have to be at least 9 inches deep. Lastly, it important the shelves will stay on the wall. Find where your studs are and try to get the shelf to cover at least two of them. You can use wall anchors but I cannot get them to work ever. (Seriously, there are weird holes in all our walls where the anchors pulled out.) The great thing about making your own is you can fit them to the situation. Unlike most of the world who have wall studs 16 inch on center, mine vary. This room has about 22 inch on center, so don’t assume.
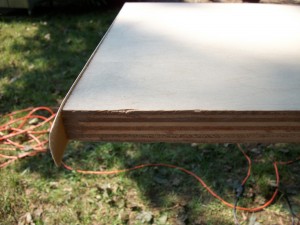
To cut the plywood down, measure twice just in case and use your cutting tool of choice – table saw, circular saw, hand saw (that will take forever). If you have none of these things or are terrified of large blades most home centers will cut the piece for you for about 25 cents. You can also ask a man who may have these tools who would love to show off his woodworking skills. Then take sandpaper or a sanding block to smooth the cut edges before you give yourself a large splinter. Since the edges of plywoods are ugly they make this veneer on a roll with glue on it to cover. It’s usually near the little wood working things like dowels and table legs an aisle over from lumber at the home center. You just iron it on to cover the layer edge using a piece of foil in between the iron and wood to protect your iron from the glue. It trims easily with a utility blade.
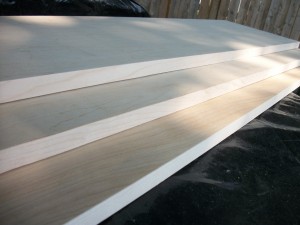
And here are the three boards with the edges covered. Since one will be on the wall, save some money and just cover 3 sides.
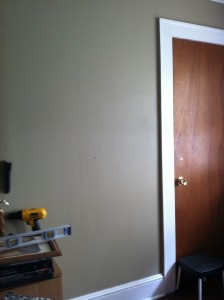
Since this is stain grade wood I could have gone that route but I was looking for a pop of white on my dark tan walls. The color scheme in the room is dark tan walls, white trim and black accents. Here is the wall before.
To install use a level. Do not eye ball this unless you would like everything you place on them to roll off the side. For the brackets, you put the screws into the wall stud and then hook the brackets over the screw. Next you lay the shelves on the brackets (and check for level again). To make sure the shelves don’t slide off, put a screw into the top of the shelf and through the bracket below. To hide the screw you can fill in with a little wood putty and paint.
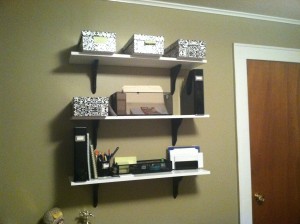
And here are the shelves all installed.
These are pretty simple looking because my aim was something that was nice and useful without being a major project. So unlike me really. You could always add things like trim around the edges to make the shelves appear thicker. It’s up to you to make as big of a mess as you want.
Tomorrow we tackle the black and white photo boxes you see on the shelves. And yes I know they stick off the end but they made after the shelves went up. I am not psychic people.


