So here I present another small gift I made for someone at Christmas. I was looking for something simple and not too expensive but that would still be nice to open. This individual is male and has a growing wristwatch collection so I thought I could make him something to keep it in.
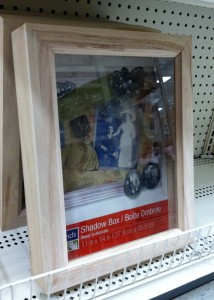
I went to the craft store looking for some kind of small wood box that I could finish. In the wood section they have all kind of unfinished wood boxes in all kinds of shapes. I thought I would pop in and grab something quick. Of course once I got there I saw nothing that I liked. As I wandered around I passed by the shadow box frames which are used to frame mementos thicker than a picture.
Here is what I started with:
Now to be clear this is not stain grade, high quality wood. So me being me, I stained it. I chose a walnut stain figuring the darkness might cover up some minor flaws and hoped for the best. I gave the whole thing a light sanding and then a wipe down with a damp cloth to clean away all the sawdust so it wouldn’t ruin the finish.
**Before I get letters from people about my using a damp cloth use, let me explain. The product I used is Safecoat Durostain which is water based and very eco-friendly. Instead of using some kind of wood primer (not eco-friendly) I use water to get the stain to apply evenly and add drying/working time. Yes this will raise the grain. And that is why I use a very, very light sanding sponge in between coats to smooth everything out. **
Miraculously the stain went on very evenly. It even looked really nice on the 1/4 inch MDF that comprises the back, now bottom, of the box. After the stain there was a light sanding (like 320 grit). To seal it I used Safecoat Polyureseal BP in gloss which is a much greener version of a standard varnish or polyurethane. It’s so much nicer to work with without all the fumes while getting the same finish as the more toxic stuff. I put a total of 3 coats on this.
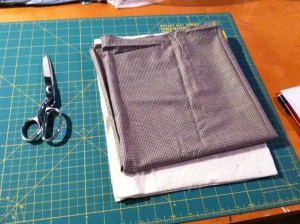
Since I didn’t want the watches or the new shiny finish inside to get scratched I thought I should put some kind cushion inside. I have a large plastic bin in my basement that has all these bits of fabric I have collected over the years just knowing I would find a use for them eventually. In my search I found a nice manly brown plaid that would work. Here is the fabric and a few layers of batting for squish.
I used the same premise as with the produce bags from a few weeks ago:
1. I cut two squares of fabric and laid them with the right side of the fabric together facing each other. Plaid makes straight lines easy.
2. I used Stitch Witchery to “sew” three of the sides together. Turn it inside out so the right side of the fabric is now showing.
3. I cut a few layers of batting to fit inside and then shoved them in. Make sure they lay flat in all the corners.
4. Tuck the open side edges together toward the inside to make a seam, shove a strip of stitch witchery inside and “sew” it shut.
5. Optional – attached a handle to open. You could do something simple like gluing on a large bead or a tiny whatever you have.
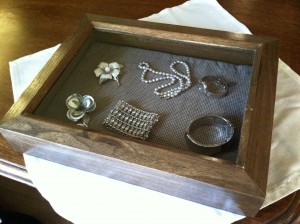
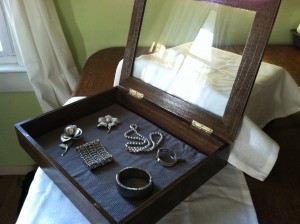
And here is the finished jewelry box!
The shadow box frame cost me $9.99. I used fabric and leftover batting I already had for $0. I also had the stain and finish on hand (and you will use very little here). If I went and bought a jewelry box it would have cost way more than this. I also would lose out on the opportunity for my friend to tell me how awesome I am and that would be a tragedy.


