I have this habit of coming upon an object and having these words come out of my mouth: “I bet I can do that better and cheaper. I am not spending good money on ______.” TB then shakes his head and I start thinking of all the ways I could get the project done.
So I have been looking for containers for my new shelving that would hide the things you may need to run a business but aren’t necessarily nice enough to display. The photo boxes I have looked at in stores can be $10-15 which gets a bit expensive when you want four. Especially since they are made of cardboard for pete’s sake.
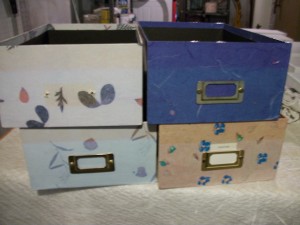
So one day I am out garage sale shopping and there are four photo boxes this woman is selling for 50 cents a piece. That’s $2 total! They are ugly as sin but who cares, I can fix that! Famous last words.
First I removed the lovely gold frame things on the front. There was no way to cover the box underneath them but I planned on reattaching. In order to get them off I had break them though so that was out. Then I realized that the current lovely colors and patterns would show through whatever I tried to cover them with. So I primed them with regular wall paint primer. I used a
small foam roller to keep it smooth. FYI – foam rollers can be washed and reused a bunch.
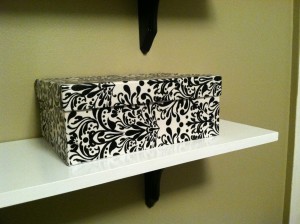
I wanted to cover the boxes in this black and white print gift wrap I had. To apply I first covered the boxes and lids with a coat of Mod Podge to act as a glue. Next I laid the paper onto the glue and tried to smooth it out gently and then let that dry. I then brushed on another coat of the Mod Podge to act as a sealer and protect the paper.
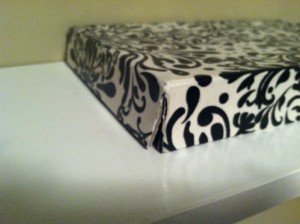
After I had let it dry I was so proud of myself at how nice they looked and I got a bit cocky. And that should have been my first clue there was something wrong. After all this is the same feeling I get when I think I am so smart for knowing a long word on a crossword puzzle and after writing it down in pen I realize it’s wrong. As I grab a lid to put the boxes together and put them on my shelf I see they don’t fit. The lids won’t go on at all! Apparently a layer of primer, a layer of paper and two layers of Mod Podge was too much for the space allowed!
I figured that up on a shelf no one would see the backside so I cut slits up the corners of the back
of the lid making side now a flap. It gave me just enough room to be able to put the lids on without looking too horrible. Pattern on the paper here was my friend and hid the error.
Well the lids were on, for good. I had been working on the lids in my basement workshop which meant that the humidity made a small mess bigger. When I a bit later went to take the lids off, I couldn’t. The Mod Podge can stay tacky even after drying and they recommend using a poly spray sealer. I didn’t since the spray poly is not eco-friendly and I didn’t want to make the coating too thick (haha). After prying it apart and ripping lots of the inside into pieces I was about to throw them away defeated.
I instead took a cloth and a bit of the Kerf’s lavender liquid wax and rubbed it on all the places that were sticking. Now we were in business. Now you can put the lids on and off with no trouble.
So in the end the boxes look nice as long as you don’t look at the ripped up inside. Some might say that this whole mess isn’t worth the money I saved or trouble I went through. But I gotta tell you I kind of like the problems because it give me a chance to figure out new ways to fix them.


