We have discussed hardware here before. While rehabbing a beautiful old bedroom set I wanted to keep the original hardware. That hardware only need a good cleaning and a polish with some wax to bring it back to life. You can read about that here.
But what if you don’t have beautiful old hardware? Or what if wax just doesn’t do enough? Some of the newer hardware doesn’t hold up to the wear and tear and layers of the metal rub off. What you are left with is something that looks dated and cheap. I know a lot of you are yelling at me right now “Why don’t you use spray paint? It’s quick and easy.” Yes it is quick and easy but it’s definitely not ecofriendly.
I have a cold air return (the metal cover where the air gets sucked back to the furnace) that came with my house in a weird tan color. It didn’t match the rest of the room so I thought I will just spray paint it! I picked up a can of oil rubbed bronze paint and sprayed it. It worked well and looked lovely. I on the other hand was nauseous from the smell and had paint all over me from the slight breeze. Now, I am usually covered with paint because I’m a klutz but usually I don’t feel like it’s up my nose. I left it on the porch to dry. After a few hours I brought it in the house and gagged. The smell was still awful. (Even my gram who isn’t as crazy with the eco stuff as I am thought it was gross.) So back outside it went for days to air out. It took a while for the smell to go away and even then I am sure there was some terrible chemical still coming off of it.
I tell you this story to illustrate why I don’t spray paint if I can at all help it. So this presents a problem of course when it comes to hardware.
And this is where chalk / clay paint comes in.
Wait, you say. Didn’t I just write a blog post very recently saying I’m not a fan of the stuff? Why yes, yes I did. I am not a fan of the lack of control on wood but I love that it sticks to metal!
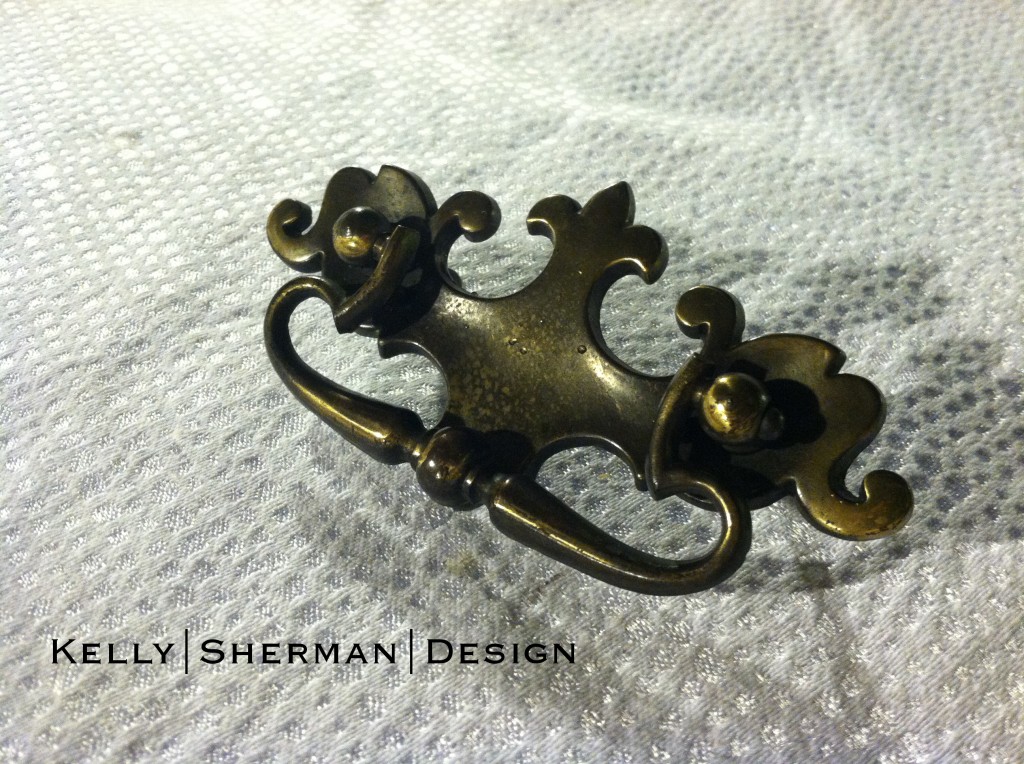
So lets take some hardware that has seen better days.
 It may not look too bad here but trust me it wasn’t pretty. It screamed 1970s.
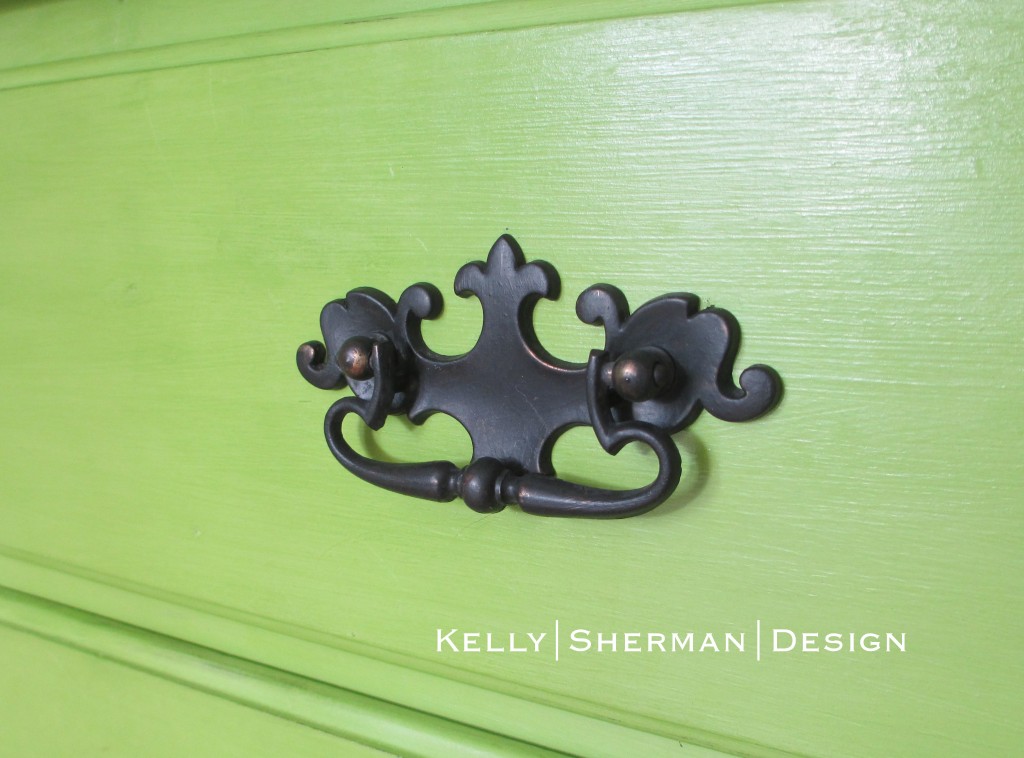
Now if we take that and brush on a tiny bit of chalk/clay paint it will stick. You don’t need a primer or to sand or whatever. Just brush it on very lightly. I used 2 coats here. You will then need to seal the paint so it doesn’t wash back off. Here I didn’t want anything shiny so I used a clear matte finish (Vermont Natural Coatings Polywhey Floor Finish) and brushed it on very lightly. Better too little and another coat then big globby brush strokes.
Here is the after. I used CeCe Caldwells Beckley Coal (black).
 One of the things that always annoys me about this paint is when you are putting a second coat on, the moisture from the paint will wipe off the first coat. Here I didn’t worry too much if there were a few edges left unpainted since I thought it gave it an oil rubbed look. If you really wanted to get good coverage maybe you would do paint then sealer then a second paint then sealer?
I got this idea from Shelly & Cathy at Shizzle Design when I saw this post. They are waaay better at this paint and the layering and jazz. The handles in the post are beautiful. I didn’t have that kind of confidence in myself so I stuck to black.
So far I have done three sets of hardware with chalk/clay paint. I am still working on new hardware for Lincoln’s dresser so in the mean time I painted the old. I can report I am pleasantly surprised that in over four months I haven’t seen any wear at all. Truthfully I didn’t think it would hold up. ( The other two sets were sold so I don’t know about those.)
I hope this gives you a more eco friendly way to rehab old hardware. Or just give it a fun colorful makeover. It’s also a way to save money since hardware is so very expensive and with this you use only a tiny bit of paint. And more things don’t end up in the landfill!!

