Last time we talked about expanding my brand presence with a custom logo stamp that I can use in a bunch of ways. Today, I have another branding opportunity – cloth labels.
Let’s say I sell a wine gift bag and that bag is given as a gift to someone else. The buyer will take my price tag off since you don’t tend to give gifts with the price on them. Now let’s say that the person who received the gift loves my bag. They think it’s an awesome idea and want to know where to get more. Unless they ask where the gift giver got it, there is no way to buy more. That in short in bad for my business.
For awhile I have been trying new fabric product lines to see what worked. Somethings, like the flour sack cloth bags, I sell regularly in my shop and I have some inventory. Other times, I would find some vintage fabric and make something great with it to see if it would sell, like the adjustable aprons I am working on but haven’t listed yet. This part of my business has been such a testing zone that it all felt a bit temporary. I didn’t give much thought to how I should have my brand there too.
Over the holidays, I sold a bunch of the wine gift bags and met someone who received one as a gift. She was in my house but had no idea it had come from me! It was then I realized that I needed to figure out some kind of cloth labels to sew inside. Me being me, I looked at a million tutorials online and a ton of people who make these on Etsy. I didn’t want to spend a ton since I wasn’t sure what style would work best. I found a tutorial that used a bunch of things I already had. Since we have been stuck inside with this weather I figured it was a good time to try it out.
The technique I used is based on the tutorials at Bug & Bird and Patchwork Pottery. The basic idea is to create your label design and then create a full page of them to print onto transfer paper. I happen to remember that I had two sheets of transfer paper from a project I gave up on over 10 years ago. I figured I could try it with what I had and then get more if it worked.
The tutorial says to use photoshop but I don’t have that. I used Word which effectively led to a lot of cursing. I’m not exactly sure what I’m missing or if I’m just asking it to do something it doesn’t do but I can never just get the right number of boxes in the right size without the margins kicking in and throwing everything off. This was definitely the hardest part but it’s done now so future labels should go much easier.
After printing a ton of labels onto the paper, I used an xacto knife to cut out all the labels. Following the package directions, I then ironed the labels onto white satin ribbon. I used a scrap of paper as a spacer to make the labels the same size. After ironing all the logos on, I left the ribbon in one piece and rolled it back up for easier storage. If all of this seems confusing, check out the links above to the tutorials. I didn’t take pictures as I went because I was just kind of making it up a bit.
And then I had labels! With my own custom logo! Here is the first one I sewed into a custom apron. (One of my favorite fabrics of all time!)
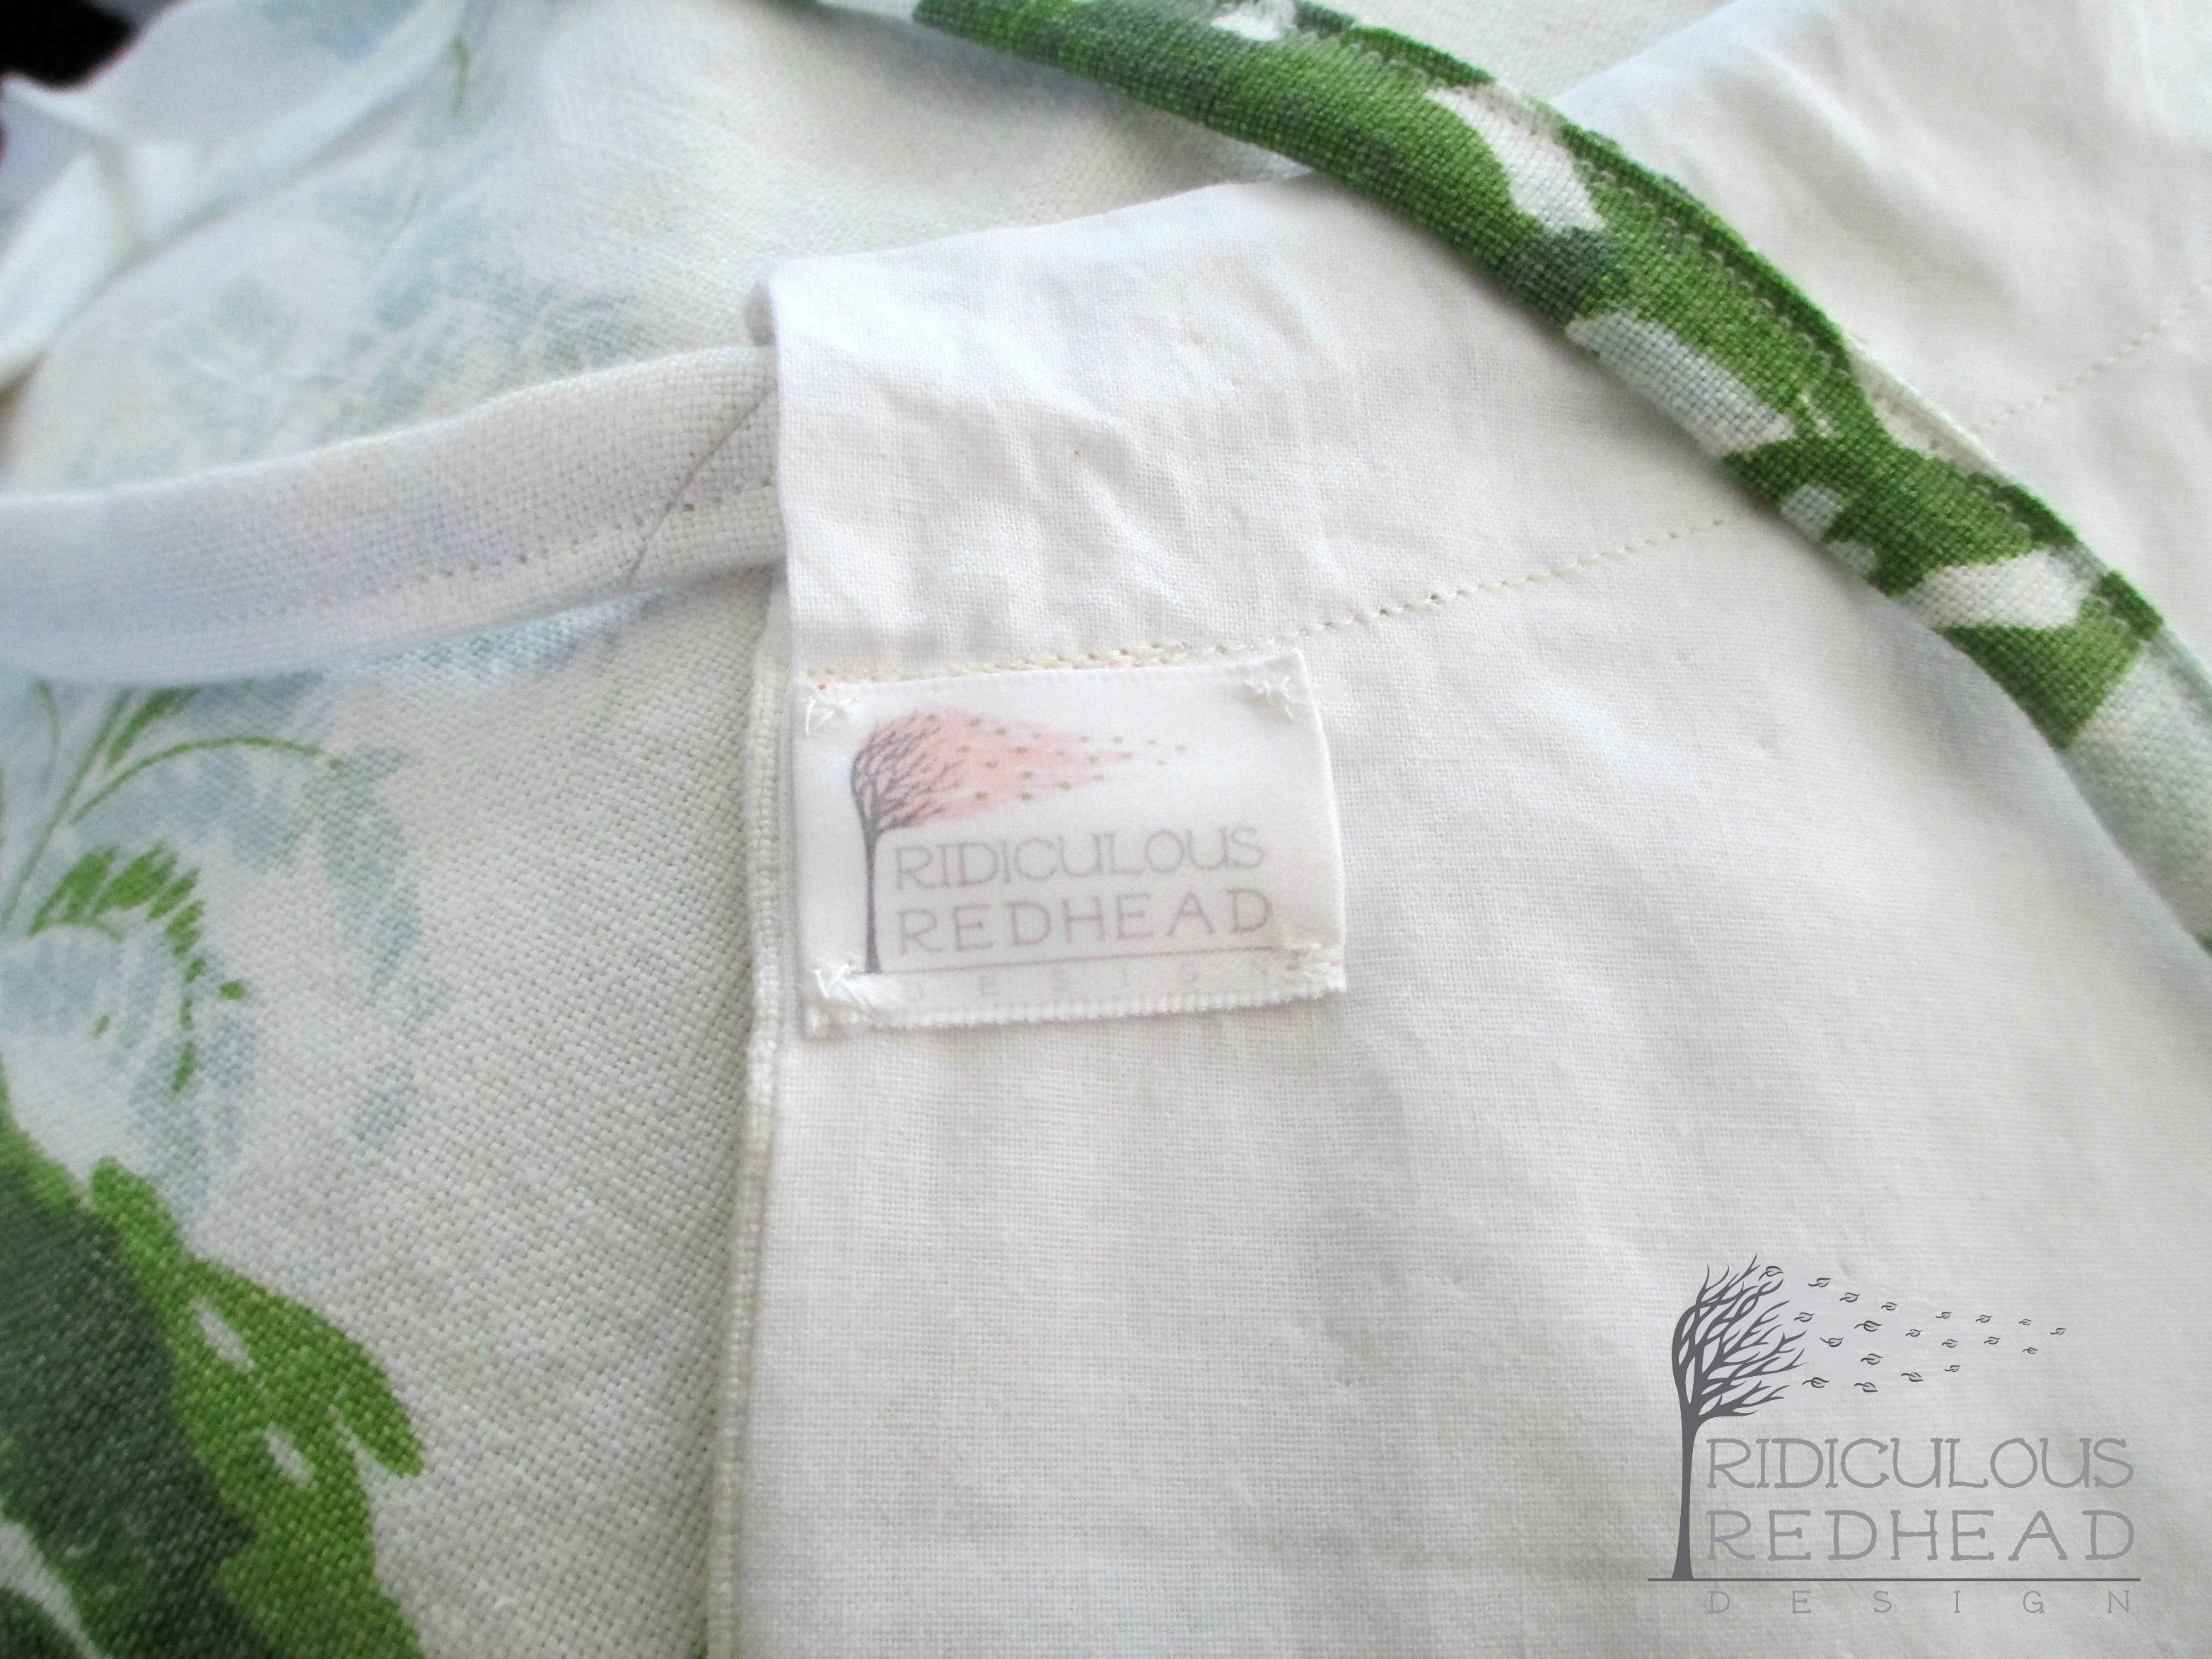
(I just realized that I was about to put my logo watermark on these, but my logo is kind of the center of the picture and it’s probable not necessary.)
Here’s a close up. I’m still working on my photos and getting the lighting right and white on white is pretty hard.
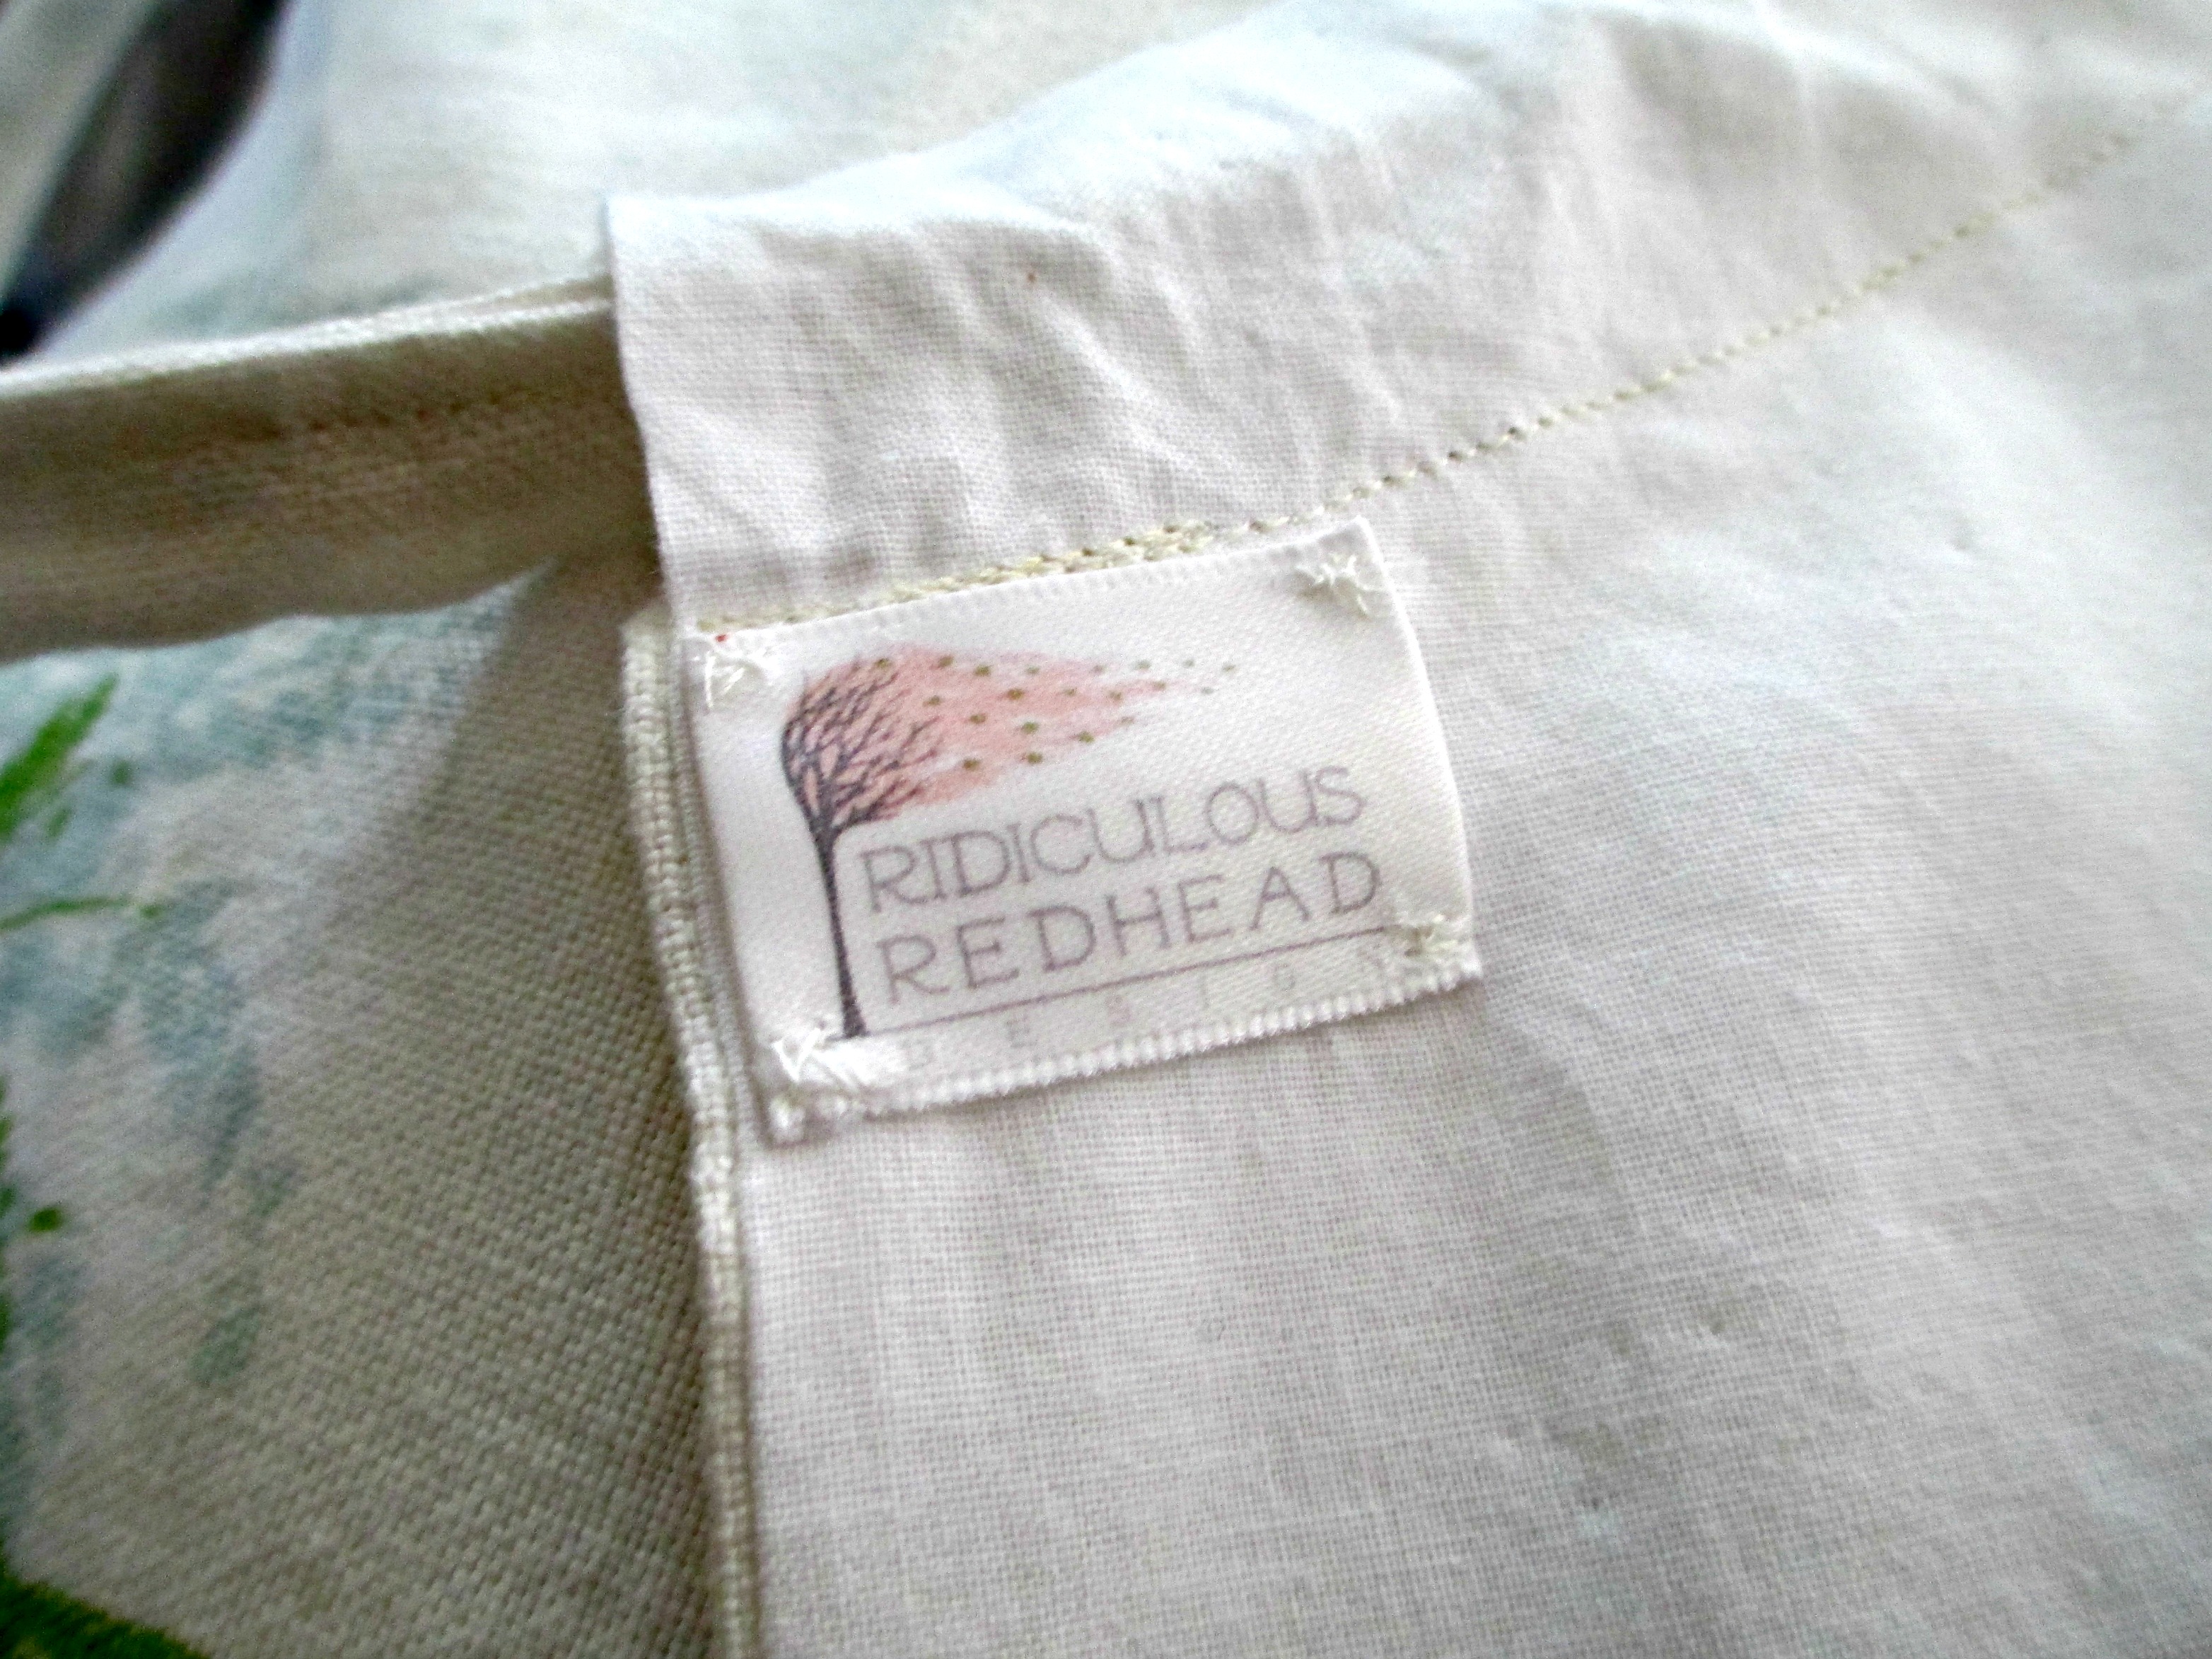
I tucked the cut edges on the left and right underneath which makes it look cleaner. It also makes it harder to get the needle through to hand sew. Since the labels are being added after the pieces are done, I will have to hand sew everything. For new pieces I can cut the ribbon twice as long and fold them in half like you would have in a shirt. Then I can just sew it into the hem to cover the cut edge. (When I ironed the labels I blank left space in between to give my self that option.) It would have been much easier to use something like Stitch Witchery to iron/glue them in but the ironed on logo would have gotten messed up. If I got these printed later that might be an option.
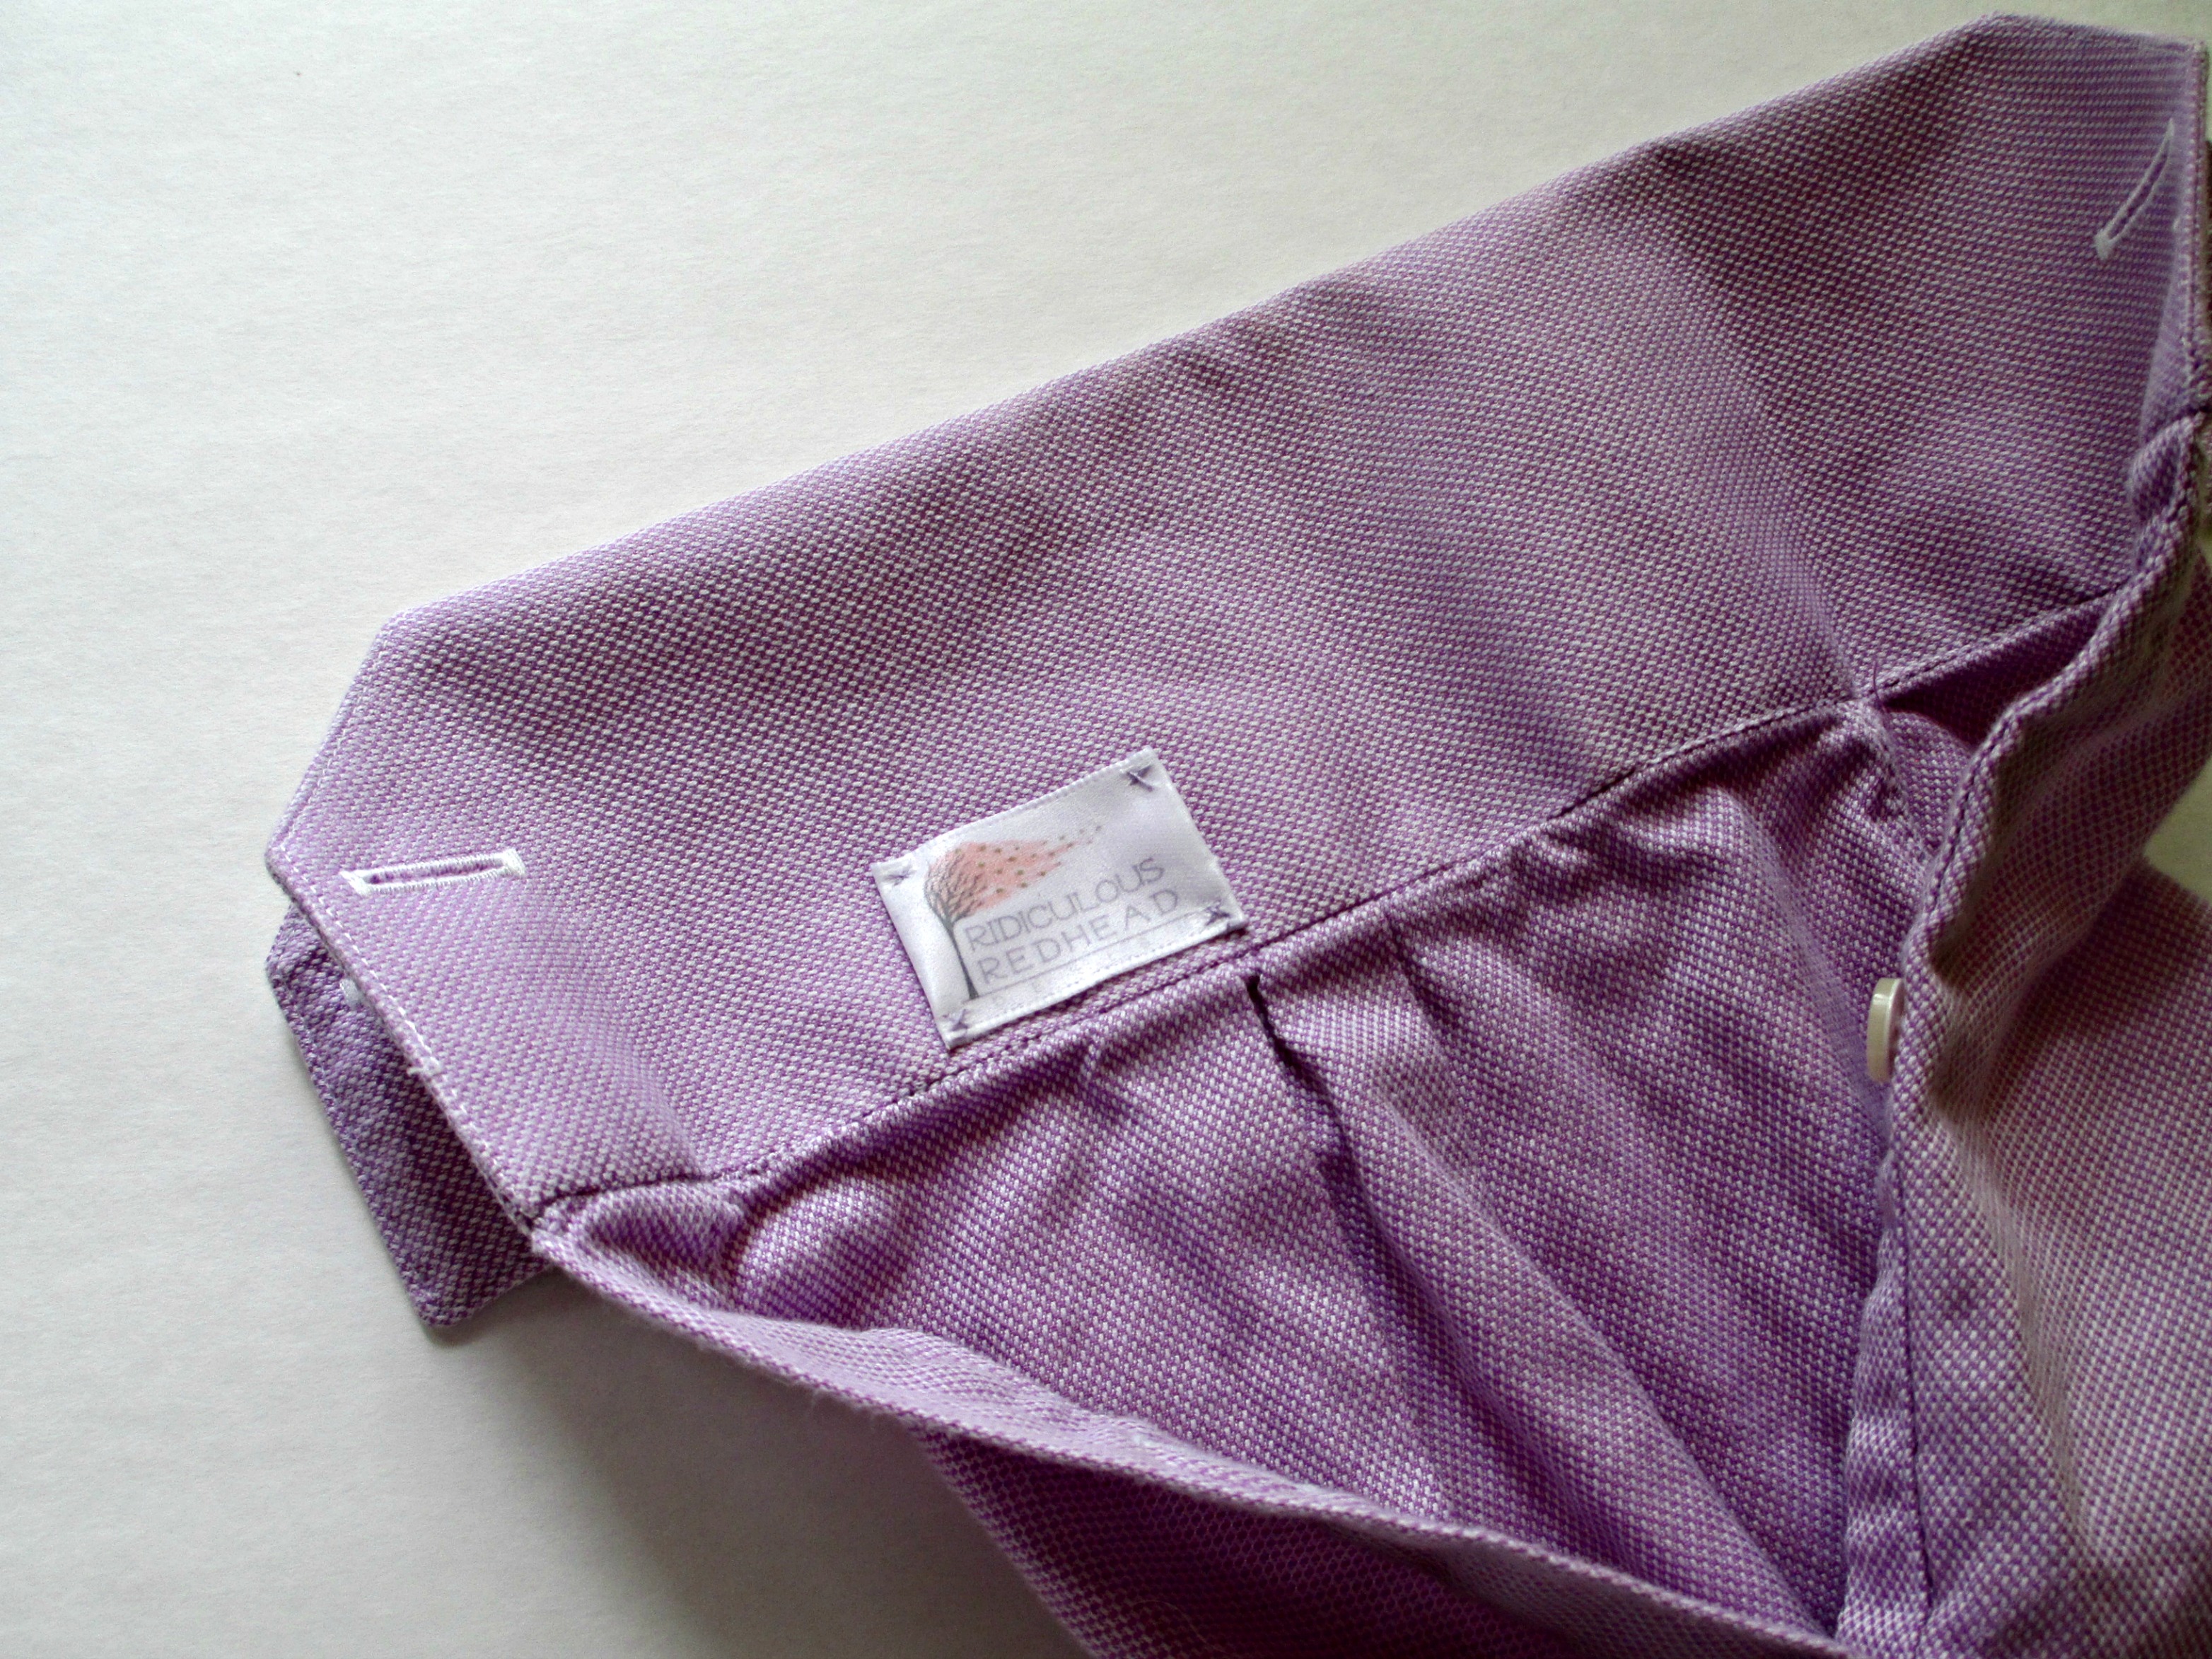
Here is the same label in a custom wine gift bag. This is beautiful fabric by the way and the rest of the shirt will soon be made into a lovely pillow.

I don’t know how these labels will work out over time or if I will rather have someone print them for me. They do get the job done telling potential customers who made them for now. The nice thing is these cost me nothing but time and some cursing. And to be truthful, I like cursing.
